Available from 9/19 to 10/11
|
10/8 |
Last day to locate Treasure Room |
|
10/9 |
Last day to send Calling Card |
|
10/10 |
Last day to steal Treasure/Heart |
This guide will only contains strategy to puzzles and Bosses in the Palace.
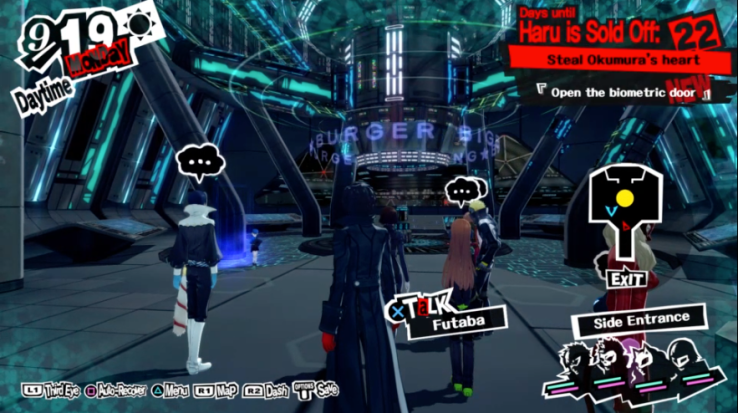
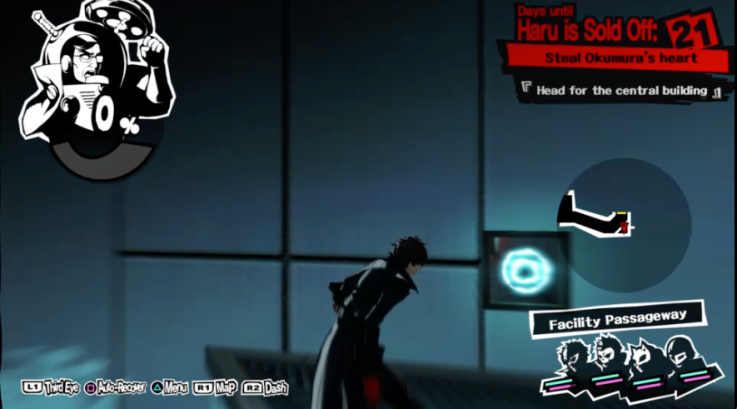
Facility Passageway
Once Haru opened the door, you will meet the first mini boss immediately.
Haru’s Fiance
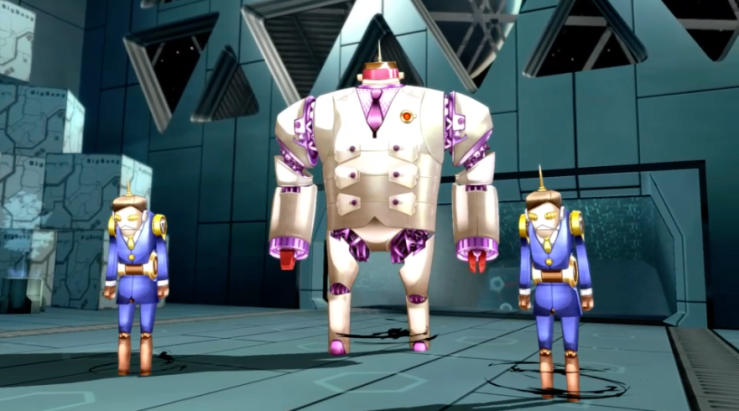
- This is an easy battle
- He is weak to Psio attack
- The two Corporobo Mdl-Wkr are resistant to Psio. Use fire attack to bring them down for an all out attack
Head down to the next area. On the left is a treasure chest and Safe Room. On the right, the door is locked, so head into the vent above.
Head to the terminal control in the center after crawling through the vent. You will unlocked the doors and also received a map. Head to the other end and crawl through the vent.
You will be blocked again and the next step is to defeat someone and get the employee ID. Head back to the area with the elevator and take the elevator.
Barracks
Head straight to the first room on top and eavesdrop on the robot’s conversation. You will learn that the Chief Clerk likes sweet.
As you move on, your party will spot similar monster and you will need to talk to them and find out who is the Chief Clerk. They are marked by red exclamation marks on the map. Head to the room on the right and tell him that you are a salesman and you have sweets. Use fire and frei attack on them.


Once you get the key hard, head to the nearest locked door and open it.
In the next area, eavesdrop to learn information about the Section Chief. You will learn that he likes to yell and say “It’s for your own good”
You will now see 3 rooms marked. The Section Chief will be yelling at you and will tell you that this is for your own good. He will be in the first room down from where you eavesdropped. Use fire and wind attack on them.


You can go around and eavesdrop again on the workers. This time, you will learn that the Chief Director laughter is “Grahahaha”, he will say “best of the best” and he will mention about young. This time you will have 5 rooms being marked. Head all the way to the last room near the entrance to find the Chief Director. Use fire and Psio attack on them.


Head back up to the Facility Passageway via the elevator and unlock the door. Take the lift to the next area.
Facility Surroundings
Head to the Safe Room first to save up. This is a very straight forward map. Just keep jumping and you will enter the next area.
Export Line
Head straight down to the treasure room and your path will soon be back. Go down to the console with a blue flashing light on top. Change the speed to 10x. The blue crane arm will overwork and collapse. Making a path for you.
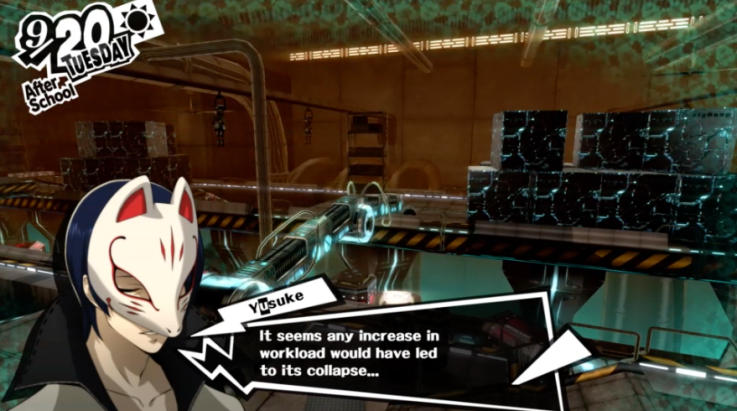
Cross the blue crane arm to the next area and find the console with pink flashing light on top. Change the speed to 10x too.
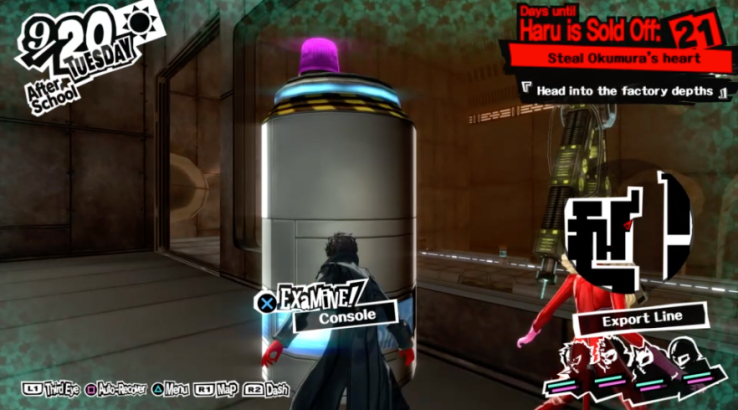
Cross the pink arm and you will come upon a treasure chest and the yellow light console. Increase arm speed and go back to where the pink console is. There is a path leading out to the yellow fallen arm.
Production Line
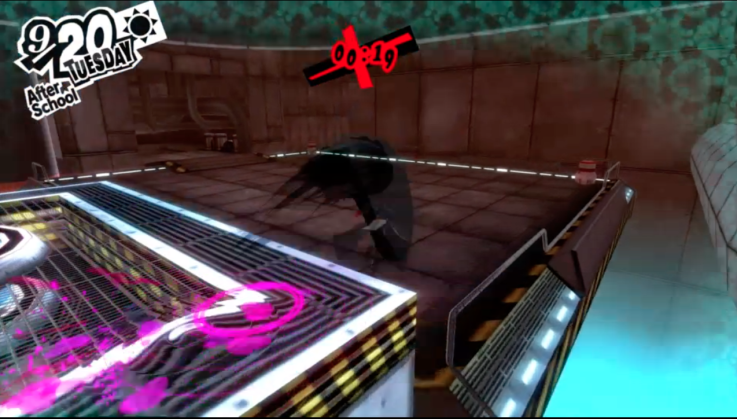
First, clear all the roaming shadows first. Go to the Blue Console and set it to “Lunch”. You only have 30 seconds to dash across the room to the blue hydraulic press that stopped. Keep pressing R2 while you run. I will suggest you run to the 2nd blue press first to get the chest.
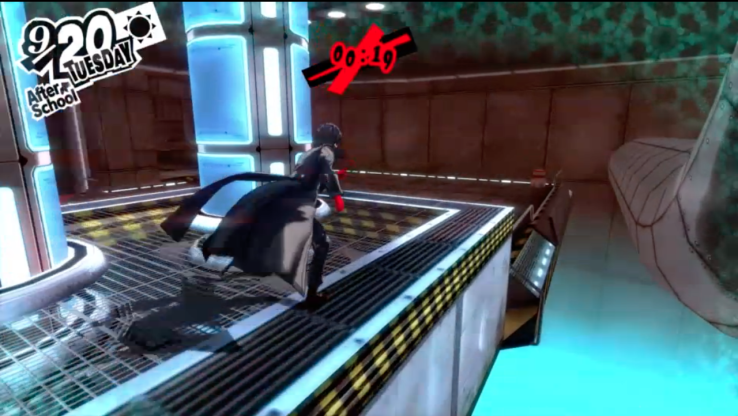
Now set the pink console to “Lunch”, and then dash across the room again.
Disposal Line
Follow the order below to clear the map
- Pink Light Console -> Increase Arm Speed -> Cross Pink Arm
- Blue Console -> Set to Lunch -> Cross Blue Press
- Blue Light Console -> Increase Arm Speed -> Cross Blue Arm
- Yellow Console -> Set to Lunch -> Cross Yellow Press
Once you cross the yellow press, you will be faced with an army of workers. Defeat them with Psio skill and all out attack.
Transfer Line
Here you will noticed that your destination is straight up but the airlock to it is inactive. You need to turn the lever to switch between the active and inactive airlock.
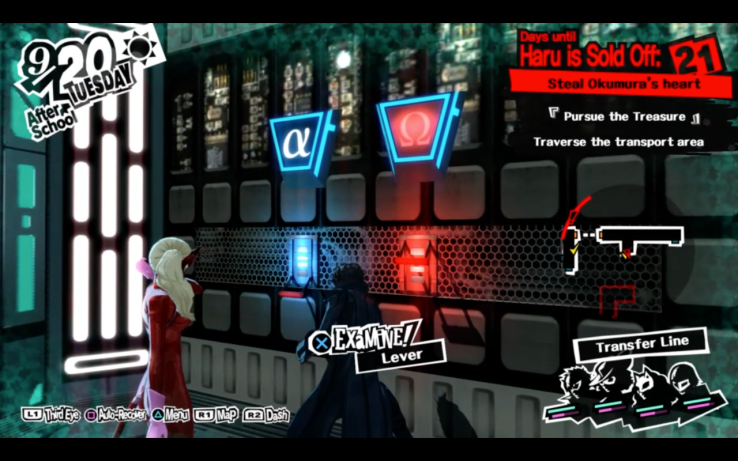
Just follow the Red Arrows shown in the map below to activate the last airlock. Follow the Yellow Arrows to head back to the activated airlock.
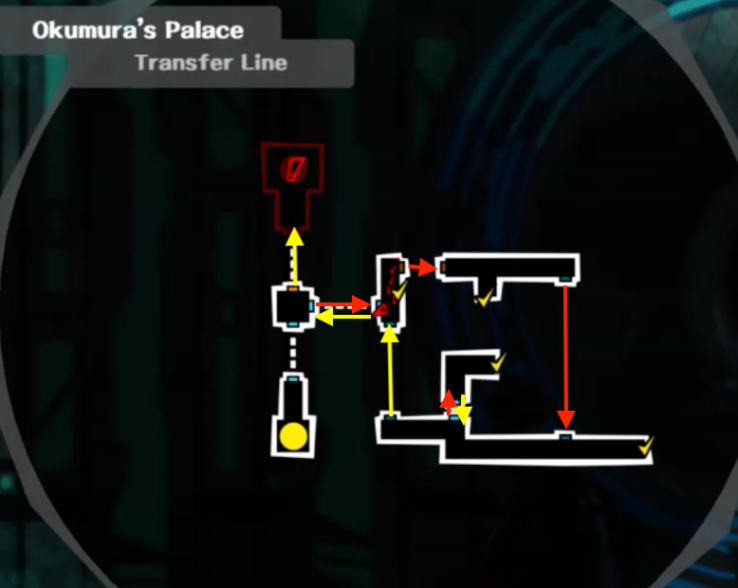
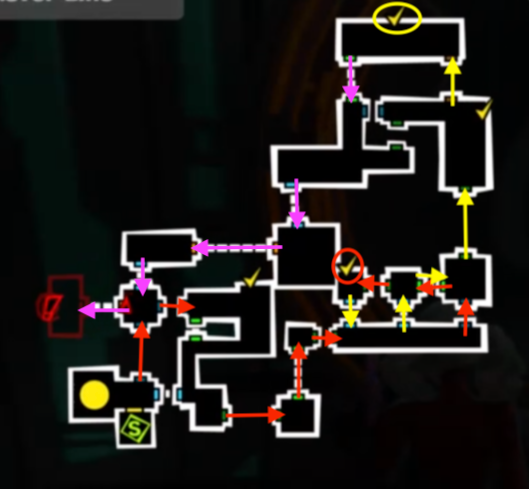
In the next area, the logic is the same. First, follow the red arrows and turn on the lever circled in red. Next, follow the yellow arrow and turn on the lever circled in yellow. Last, follow the pink arrows to the next area.
Weapon Production
Head into the room and you will spot the treasure.
Route to Treasure is now secured!
When you head back after sending the calling card, you will noticed that the treasure flew up into the UFO and you have only 10mins to reach it, including shadow battles!
Shadow Okumura
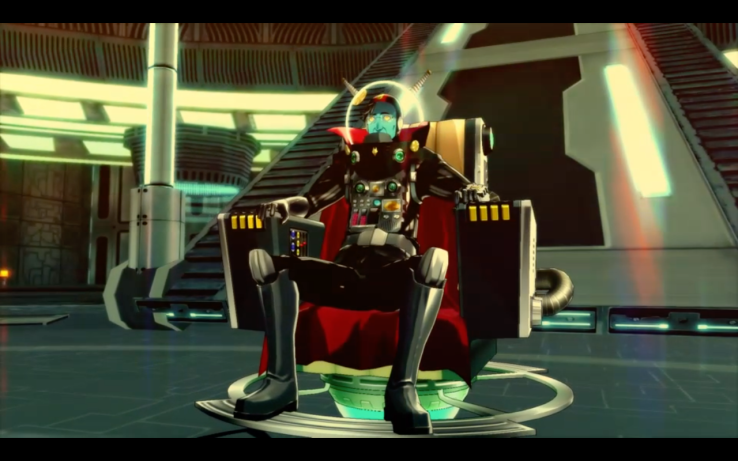
Battle Tactic
- This time round, the boss battle is timed. You only have 30mins to take him down.
- Okumura will summon his workers for the battle. Use their elemental weaknesses and cast AOE elemental attack on them.


- Unfortunately, you won’t be able to use all out attack in this battle.
- Take note when Okumura uses Sacrifice Order. The workers will deal huge damage to the whole party.
- Beware when he summon the Executive Director as he has no weaknesses. He will use Big Bang Order that will wipe out your whole Party. Guard when he uses the skill.
- After the battle with the Executive Director, you can now attack Okumura. It will only take a few easy hit to take him down now.

OK you are the transfer line God so immense gratitude. Now tell us how to finish the boss for.a.challenge.
Which accessories would you.advise?
Which skills per Persona?
Which Personas?
I am slaughtered
LikeLike
I’m not huge on accessories and always wore the SP generating ones because that’s the one that is gonna help me most in my battle.
Bring Panther (For Fire), Noir (For Psio) & Queen (For Frei) as their elemental damage will help in the battle. Switch up with Mona when you need Wind AOE & also Heal skills.
For Joker, bring any persona with level well matched with your team that has Fire, Psio, Wind & Frei skill.
You can check my battle video on what Personas I have used and the skills equipped.
LikeLike
Master I shall follow your instructions and report the results back to you
LikeLiked by 1 person
I too have developed an undying love for this HERO amongst humans. that image of the Transfer Area kept me from breaking the disc in half
LikeLike
Lol! I’m glad I saved your disc!
LikeLike
I just want you to know I love you. I’ve been trying to find a good walk through for the transfer line, and I was hoping someone mapped it out. You’re literally the best
LikeLiked by 1 person
Thanks for the kind words! Glad it helps.
LikeLike
Thank you for the transfer line help, I was struggling for sooo long but w ur guide it took like 3 minutes. I owe u my life
LikeLiked by 1 person
Glad that it helps!!
LikeLike